Your Andersen® hardware, such as locks, door handles, hinges, and more, plays an important role in your home's look. Keeping these parts in good condition shouldn't be complicated.
How to Clean and Care for Hardware on Andersen Windows and Patio Doors
To maintain the appearance of your Andersen® window and patio door hardware, follow the simple steps in this article.
When to Use This Article
We recommend following the instructions in this article to check your hardware's condition and clean it at least once a year. If you live in a coastal, industrial, or agricultural area with higher levels of airborne material like dirt, dust, smoke, and salt spray, we recommend following these instructions at least every three (3) months.
Note: Climate, location, and exposure to corrosive environments pose challenges to maintaining the hardware's beauty and characteristics. Regular care and maintenance are especially important in coastal, industrial, or agricultural environments to prevent corrosion or tarnishing.
This Article Will Help You:
*Optional depending on the type of hardware you have/want to clean and maintain.
Safety Warning
Tools and Supplies Needed
- One (1) soft cleaning cloth
- Mild soapy water
- Commercially available chrome polish
- Light mechanic oil, mineral oil, or sewing machine oil
Let's Get Started
Clean Andersen Hardware
For general cleaning of Andersen hardware, including all finishes mentioned in Andersen® Hardware Finish Options, wash the hardware with mild soapy water and a soft cleaning cloth.
Important:
- Do not use or apply harsh chemicals, abrasives, and/or cleaners. Product damage could occur.
- Some types of hardware finishes may require additional specific care instructions. See the sections below for finish-specific instructions on polishing and refurbishing.
- For specific finishes mentioned below, do not refurbish the hardware. Contact a professional hardware restorer for refurbishing.
Lubricate Hardware
After cleaning, lubricate moving hardware parts with a dry silicone spray.  For written instructions on lubricating the hardware, see Lubricate Andersen® Window and Patio Door Hardware.
Important: Liquid spray lubricants, including those with acetone, and oil-based lubricants are not recommended.
Check Hardware Screws
Hardware screws, especially hinge screws, should be periodically inspected and tightened if necessary. Over time, wind can impact the sash, loosening hardware fasteners.
Polish Polished Brushed Chrome and Polished Chrome Hardware*
Click to View Details
|
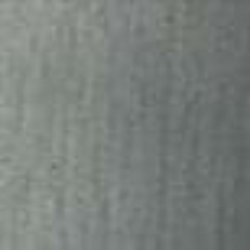
Polished Brushed Chrome: Cool silvery and blue undertones, slight brush marks, and muted with lower reflectivity.
Note: This Andersen brand finish has been discontinued.
|
Polished Chrome: Shiny silver, high reflectivity, and no brush marks.
Note: This Andersen brand finish has been discontinued.

|
To polish Polished Brushed Chrome and Polished Chrome finishes, use a commercially available chrome polish and follow the manufacturer's instructions.
Polish Oil Rubbed Bronze and Distressed Bronze Hardware*
Click to View Details
|
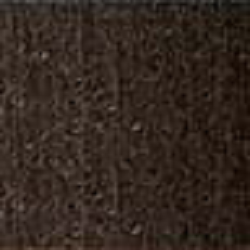
Oil Rubbed Bronze: Very dark finish with chocolate undertones, no reflectivity, and over time, the initial finish will wear, revealing dark copper undertones.

|
Distressed Bronze: The dark finish with chocolate undertones and hints of copper at the edges/curves, a very noticeable brushed/grainy appearance for an antique feel, and, over time, the initial finish will wear, creating a two-tone appearance.
|
Both Oil Rubbed Bronze and Distressed Bronze hardware are designed to develop a patina, or aged-bronze look, over time. Oil Rubbed Bronze and Distressed Bronze are considered "living finishes" with no protective coating. With frequent use, the natural oils from your hands will polish away the dark outer finish, exposing the bronze beneath and often resulting in a two-tone appearance. No method will speed up the natural bronzing process. The appearance of these finishes will vary depending on usage and environmental conditions.
To deepen the color and sheen of your Oil Rubbed Bronze and Distressed Bronze hardware, occasionally apply light mechanic oil, mineral oil, or sewing machine oil to all metal parts.
- Coat all metal parts with the mild oil.
- Allow the oil to sit for a few minutes.
- Gently rub off any excess oil using a clean cloth.
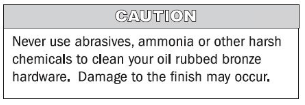
Note: We recommend that you bring your hardware to a professional restorer if it was treated with abrasives, ammonia, or other harsh chemicals.
Differences Between New and Seasoned Oil Rubbed Bronze*
Click to View Details
The appearance of the Oil Rubbed Bronze hardware will vary depending on usage and environmental conditions. Below is an example of a new door handle versus a handle that has been seasoned over time.
Note: This process will be similar for Distressed Bronze hardware.
|
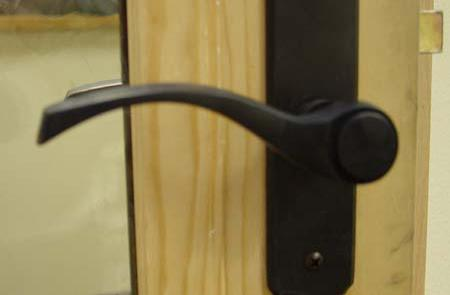
New Oil Rubbed Bronze Finish
|
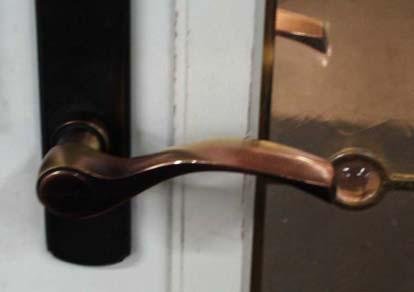
Seasoned Oil Rubbed Bronze Finish
|
Restore Antique Brass and Bright Brass Hardware (Manufactured before July 1998)*
Click to View Details
|
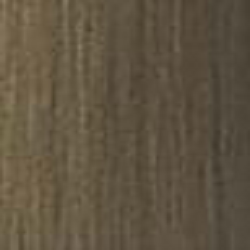
Antique Brass: Deep gold finish and slightly noticeable appearance of dark brush strokes.
|
Bright Brass: Lustrous, bright yellow, high reflectivity, and no brush marks.

|
If your Antique Brass or Bright Brass hardware is in good condition, apply a non-abrasive paste wax (Johnson® or Turtle Wax® brands) following the manufacturer's directions to protect and restore it.
Important:
- Stripping and cleaning compounds may contain harsh chemicals. Follow the safety precautions listed on products.
- Do not use abrasive cleaners, cloths, or brushes on Antique Brass and Bright Brass manufactured BEFORE July 1998.
- Do not restore/refurbish Patio Door Bright Brass Hardware manufactured AFTER July 1998.
If the clear coat on the hardware has been scratched or worn off, the brass will tarnish. This will appear as a brown, black, green, or copper-colored film. In these instances, you will need to remove the clear coat and refurbish the brass. To refurbish your hardware, follow the general guidelines below or consult a refinishing professional.
- Remove the brass hardware from the unit. Refer to the mounting instructions included with the hardware.
- Following the manufacturer's directions, remove the clear coat from brass hardware by placing it in a paint stripper containing methylene chloride (Stripez, Zip Strip™).
- Remove hardware from the paint stripper.
- Rub lightly with #00 steel or bronze wool to remove any remaining clear coat or tarnished areas.
- Rinse the hardware and continue to lightly rub until the brass color returns.
- When the clear coat and tarnish have been completely removed, clean the Brass Hardware using a copper cleaner (Tarni-Shield®, Brasso®, or Copperbrite) following the manufacturer's directions.
- Reapply the optional clear coat using a clear lacquer spray. Reapplication of the clear coat is not recommended in corrosive environments, as tarnish may appear beneath it. In these environments, it is recommended that the hardware be cleaned as needed.
- Reassemble and reinstall Brass Hardware on the unit, following the mounting instructions.
Note: If one piece needs to be refurbished, we recommend refurbishing the entire set. There is a noticeable difference between coated and uncoated pieces.
Related Articles
To improve the operation of the hardware or other moving components on your Andersen® products, they may need lubrication. For more information, please see Lubricate Andersen® Window and Patio Door Hardware.
©2026 Andersen Corporation. All rights reserved.