This article has installation instructions for corner foam weatherstrip for 400 Series gliding windows.
400 Series gliding windows use a corner foam weatherstrip. The corner foam weatherstrip is located in all four (4) corners of the window sash frame within the bulb weatherstrip.
Corner Foam Weatherstrip
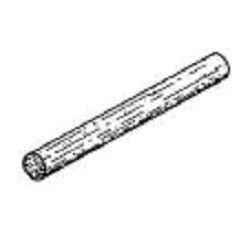
Corner Foam Weatherstrip
Replacement corner foam weatherstrip is available in universal size and color.
Corner Foam Weatherstrip Replacement Instructions
Tools/Supplies Needed
Safety Glasses
Corner Foam Weatherstrip
Needle Nose Pliers
Mild Soapy Water
Soft, Dry Cloth
Remove the sash, following the guide Active and Passive Sash Replacement for 400 Series Gliding Windows (0004368). 
Using needle nose pliers, remove the original corner foam weatherstrip.
Clean the sash corners with mild soapy water and a soft, dry cloth to remove any dirt or debris.
Using a 3" length of foam weatherstrip, gently insert half of the foam weatherstrip into the hollow opening of the rail, leaving the other half sticking out.
Using the other half of the foam weatherstrip that is sticking out, tuck it into the stile bulb weatherstrip, creating a beefy seal around the corner.
Repeat for each corner and reinstall the sash.
©2026 Andersen Corporation. All rights reserved.