This article is for rail weatherstrip on 200 Series gliding windows and provides step-by-step replacement instructions.
200 Series gliding windows use rail weatherstrip on the window sash. The rail weatherstrip runs horizontally on the top and bottom of the window sash. If assistance is needed in identifying Andersen® products, visit our Identify Your Product  pathway in the Andersen® Window and Door Help Center.
Replacement Parts
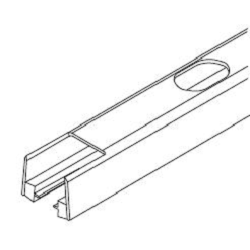
Rail Weatherstrip
Replacement rail weatherstrip is ordered by the size of the window sash.
Installation
Tools/Supplies Needed
Safety Glasses
Needle Nose Pliers
Rail Weatherstrip
Two (2) 1/2" Tacks
Mild Soapy Water
Soft, Dry Cloth
Remove the window sash using the window sash removal instructions (0005338).
Rail Weatherstrip Replacement Instructions
Using needle nose pliers, remove the old weatherstrip from the cavity.
Clean the area with mild soapy water and a soft, dry cloth to remove any dirt or debris.
Position replacement rail weatherstrip in the cavity and secure with two (2) 1/2" tacks spaced three (three) inches from the stile.
Reinstall the window sash by following the window sash removal instructions (0005338).
©2026 Andersen Corporation. All rights reserved.