To protect the beauty and performance of your Andersen® windows and doors, unfinished wood interior surfaces must be properly stained and finished before or immediately after installation. This will ensure your product has long-term durability and maintains coverage under Andersen® Limited Warranties.
How to Stain and Finish Wood Interior Surfaces on Andersen® Windows and Doors
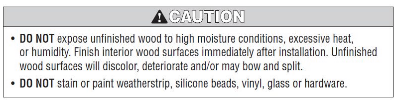
Important: Unfinished wood surfaces will discolor, deteriorate, and/or may bow and split. If your Andersen product arrives or is installed with an unfinished interior wood surface, the proper preparation, application of stain and finish, and the use of the correct tools and supplies are essential. This article outlines guidelines, recommendations, and instructions for staining and finishing.

A-Series Casement and Picture Windows with Transoms; Maple Interior with Custom Stain
This Article Will Help You
- Understand guidelines and recommendations on what not to use on Andersen products when staining and finishing unfinished wood surfaces.
- Stain and finish unfinished wood interior surfaces on Andersen products.
Safety Warning
Tools and Supplies Needed
- Steel wool or 240-grit sandpaper
- 220-grit sandpaper
- Painter's tape
- Dry rag
- Tack cloth
- Wood stain (for more information on matching stain and paint colors, see Matching Andersen® Window and Door Stain and Paint Colors.)
- Plastic scraper
- Pre-stain wood conditioner
- High-quality stainable putty (if the component is held in with nails)
- Wood sealer (any conventional lacquer, varnish, or polyurethane)
Let's Get Started
Important: Read and follow these instructions completely. If your abilities do not match this procedure’s requirements, contact an experienced contractor. You may direct any questions about this or other products to your local Andersen dealer, or Contact Andersen® Windows and Doors directly.
Guidelines and Recommendations for Staining and Finishing
- All wood surfaces must be dry and free of dirt, dust, and other contaminants before staining.
- Applying a wood conditioner before staining is recommended to help reduce natural color variations in all wood.
- We strongly recommend following the stain manufacturer's recommendations and instructions for the specific wood species used on the interior of your window or patio door. Wood species vary in how well they accept stain. Naturally occurring variations in grain, color, and texture make each wood product one-of-a-kind.
- The first finish coat should be a thinned clear sealer or a combination stain/sealer. This will seal the wood surface and help promote a more uniform stained appearance. Some very porous woods, such as Alder, may require an additional sealing coat.
- Use a product with high-quality ultraviolet blockers. Avoid transparent or semitransparent stains on exterior wood surfaces. Solid-color stains are formulated with a higher pigment concentration and will better protect wood against ultraviolet damage from the sun.
Do NOT use:
- Orbital or belt sanders when preparing surfaces.
- Stains, lacquer, or polyurethane finishes on the exterior of wood doors and windows.
- Creosote-based stains.
1. Prepare the Product for Staining
- Open or remove the product/part you are staining.
- Fill any nail holes with a quality, stainable putty, following the manufacturer's instructions.
- Lightly sand the interior unfinished wood surface with steel wool or 240-grit sandpaper.
- Wipe the dust off with a tack cloth between each sanding.
- Apply painter's tape to the glass for protection.
- Apply the pre-stain wood conditioner, following the manufacturer's instructions for application and dry time.
2. Apply Stain to Product
- Apply wood stain following the manufacturer's instructions. Make sure to finish all hidden wood surfaces.
- Clean any excess stain from the glass using a dry rag.
- Allow the stain to dry according to the manufacturer's guidelines before further finishing is attempted.
3. Seal the Stain to Finish the Product
- Apply wood sealer following the manufacturer's instructions. For a clear topcoat finish, use a solvent-based finish with an ultraviolet inhibitor. A Spar or Marine Urethane is recommended. Apply at least 3 clear topcoats.
- Follow the manufacturer's instructions for dry time and sanding between coats using 220-grit sandpaper.
- Remove dust between each application, wiping the sanded area with the tack cloth.
- Apply one last coat of sealer. Most professionals recommend three (3) coats for a lasting finish.
- Remove the painter's tape from the glass.
- Clean excess sealer from the glass using a plastic scraper.
- Let the sealer fully dry before reassembling or closing the window sash/patio door panel.
Related Articles
For additional painting and staining resources, see Information for Painting and Staining Andersen® Products.
©2026 Andersen Corporation. All rights reserved.